| Home
Photo Gallery-under construction
About...
What's New Page
Helpful Links
Articles - under construction
Contact us
|
|
|
About the articles
In this section I plan to include both my own information, and articles from others who have been kind enough to donate their wisdom. I hope that you can find some useful information to help make your flocks healthier, and your time with them more enjoyable!
By the way, out of consideration I ask that these articles aren't reproduced without my permission. Just email me and I'll be glad to help. Thanks!
|
 Fighting Respiratory Illnesses in your Flock
I am not a veterinarian, and as I'm here and you're there, I don't claim to be able to give a true recommendation as to what you should do with your birds if they are ill. However, there are some things that I have learned while raising poultry that I hope will help you to keep your respiratory illness time down to a minimum in your flock. I hope this information can be of use to you.
When a chicken has a respiratory problem, I believe it's best to attack the illness with three weapons: Antibiotics (always paired with probiotics), Nutrional support, and Decongestants.
ANTIBIOTICS Despite what the feedstore clerks recommend, I hold little faith in water soluable antibiotics (especially Terramycin), and for good reason. First, you can never really be sure how much the bird is taking in. If they're taking less than the recommended dosage, you could actually be setting up the bird for antibiotic resistance problems. Also, many vitamins and antibiotics lose their effectiveness sitting in water. Unfortunately, sometimes that's all one has (or can afford). So to boost the effect, give the full dosage in the water AND then use the amount recommended for one gallon in one CUP of water, instead. Mix that medicated cup of water into some old fashioned oats, crumbles, or whatever you know your birds just can't resist. Try mixing something else like chopped grapes into it to further tempt them. That way you'll know that at least they got good medicine before it could degrade. Treat your vitamins in the same way to prevent them degrading in the water and leaving a 'soup' in which bacteria flourish.
Injectable antibiotics are by far the better option. It's really simple to give a shot to a chicken if you follow a few simple rules. I'll post what I learned as a vet tech above for those who might be interested. On behalf of injectables, they're less likely to degrade and lose efficiency, they get to the system quicker, and you KNOW that your bird got the whole dose. I love them and Tylan 50 is my all time favorite! It gets the job done in three days, five max.
ANTIBIOTICS' PARTNER, PROBIOTICS: As with any time you give antibiotics, you should also give "probiotics" daily during treatment and for two days thereafter to prevent secondary intestinal complications due to good bacteria getting off balance because of the antibiotic. An easy way is by using yogurt (1 tablespoon per adult bird) mixed in crumbles or anything else the bird simply can't resist! Usually the first time they find it a bit sticky, but thereafter they'll love you for it. I use non-artificially sweetened 'live culture'. You can also use human probiotics or livestock prepared probiotics. Just make sure it either says 'live culture' or refers to CFU (Colony forming units).
NUTRITIONAL SUPPORT: The target vitamin which helps birds with respiratory illness (and health) is Vitamin A. Unfortunately, you can overdose a bird with this vitamin so don't use human "Vitamin A". You can instead use Beta Carotene, which breaks down into only the amount of Vitamin A that a bird needs. Also, you could use cod liver oil, or wheat germ oil blend once a week at a rate LESS THAN 2% of their total feed weight for the day. Mix that into your yogurt glop, or into crumbles or grain. For those who can't measure 2% (like me) pour a tablespoon into a bucket of grain, stir thoroughly and quickly, and repeat until the grains or pellets are only slightly more shiney. Vitamin A helps respiratory health, mucous membrane health, and eye health. Your bird will need this additional support during illness because he's using up his normal supply to fight his "cold".
DECONGESTANTS: A bird can't heal if the bird can't breath. It can be assumed, upper or lower respiratory, that if your chicken has a cold or problem that it will have inflammation making breathing more difficult. Help him along by rubbing VetRx on his wattles, comb, beak, and under the wings (for when he sleeps). Warm it up and use it straight. You can also drop a couple of drops, straight, down the throat for the Chicken-Listerine effect. Furthermore, you could add that to the yogurt-vitamin-glop! He'll breath better and heal better. If you can't find VetRx in your area, you could make it at home using 50% each Spirits of Camphor and Castor Oil.
If you attack each case of respiratory 'crud' this way, you'll find that your birds are under treatment for less time and recover more easily. I hope that it works for you as well as it has for me!
|
|
Afraid of giving injections?
Who isn't, at first? However, if you get in a situation where your chickens need antibiotics, you'll find that this is the most efficient and trustworthy way of treating them! I'd like to help you through it, if I may. Once you get over the fear of giving them you'll wish you had done it long ago.
WHY DO IT: The reasons that injectable medicines are very much preferable to oral medication methods are these, among others: 1) The dosage is assured; there is no guessing just how much a chicken drank, or whether or not it even WILL drink because of the taste of the medicines. 2) The medicine gets into the system quicker since it goes into the muscle. 3) The length of antibiotic therapy is shorter because of assured dosage, medicine strength, and efficiency of getting into the system, and the quaranteed freshness of the medicine. 4) The medicine is LESS likely to degrade that powdered antibiotics, which must be stored in very controlled conditions.
WHAT WILL YOU NEED: 1) Either 3 cc syringes w/.22 gauge needles, or diabetic syrings with needles. I prefer to use one syringe/needle per bird, but at least use one needle per bird as you don't want to put a used needle back into the medicine bottle 2) A helper. 3) Some paper towels and alcohol, or alcohol swabs 4) A cup or something to hold your supplies and used needles/syringes.
PREPARING FOR SHOT TIME: It's less confusing if you put the meds into the syringes while you are still in the house, or at least before you start handling the birds. I like to get all my syringes filled and needle caps back on and just take them out like that. That is how we did it at the vet clinic. Here is the method that works best.
If the needles are separate from the syringe, take the syringe out of its holder. Also, take the end cap (not the long needle cover) off of the needle and screw the needle on, or pop it on (depending upon what type you got). Do this for however many syringes you will need.
I always wipe the top of the injection bottle with alcohol first before I pull the medicine.
Take your first syringe and needle. Take off the needle cover carefully. Before putting the syringe in the med bottle, pull air into the syringe in the same amount of air as medicine that you will be pulling. For example, if you are going to use 1 cc of medicine, pull a teensy bit over 1 cc of air into the syringe.
Now, holding the med bottle bottom up, gently put the needle into the med bottle. The medicine will automatically start to fill the syringe for you. Pull a little more than needed out, then thump the syringe with your fingers before pulling it out of the bottle. This puts the air bubble at the top. Press the plunger gently to push the air bubble into the bottle and get to only the amount of medicine you need. Then pull the needle out and put the cap on. Repeat for all the syringes you'll need at that moment.
I like to put all my syringes, plunger up, into a cup to take out with me. I also use the alcohol swabs that you can buy a box of at the drug store for a dollar. I take one of those for each shot, plus a couple of spars, in my pocket.
Put on some old clothes so you can toss them in the wash (since you are dealing with sick birds), get your helper to do the same, and you are ready to go to the barn.
GIVING THE INJECTIONS: Have your helper pick up the bird holding its wings to their body, the bird's breast to you, gently.
Now, think of a chicken breast from the store, when they are split and ready to cook. On the chicken, find what would be the middle of one of those breast halves. In other words, on one side of the chicken's chest, find the middle of the breast. Avoid going close to the breast bone, or too close to the wing, to low by the abdoment, or too high by the neck. Smack dab in the middle.
Separate the feathers on a good meaty looking spot, the wipe the skin with the alcohol swab. Some people don't do this, but I'm a stickler so I do it anyway, especially if the bird has any respiratory illness where they might have gotten their mucous on their feathers.
Then, pull the right syringe, remove the needle cover. Part the feathers again, then gently put the needle to the breast skin. You can steady your hand with your other hand if you wish; it will probably make you feel more assured. Now, don't push the plunger yet; read the note.
**NOTE** - when you put the needle in the bird will squawk like you've hit him straight in the heart, and wiggle like he's in horrible pain. He's only surprised and feeling a sting; don't let him fake you out.
OK, now brace yourself and gently put the needle into the breast JUST A BIT. I usually push it in less than 1/8 an inch for bantams, less than 1/4 inch for the meatiest and largest birds, we're talking big! You just want to make sure that the hole part of the needle gets into the muscle. Take a good look at a needle before you set out for the barn to help see how far that is.
BEFORE YOU PUSH IN THE PLUNGER... pull it out a little and look at the medicine. If you see blood (which you most likely won't) then relocate to a different spot and don't put the needle in so far. Don't be alarmed and don't feel too cockey and figure you don't need to check- this is a good check point for your peace of mind. I've been giving shots for well over 20 years and I check each and every time.
NOW, push the plunger gently but firmly til all the medicine is in. Then pull the needle out gently and cap it and put it somewhere safe.
At this time, I like to rub that area with a tissue to help the medicine absorb (especially with thicker antibiotics). It's not necessary, but if you want to do it, it's a good step.
THE FINALE! Pat yourself on the back for being SUCH a good chicken steward!!!
By the way, the method I described above is for Intermuscular injections (IM). You would use the same procedure for SubCutaneous (SC) shots except instead of finding the meaty part of the breast, you pull up neck skin, insert the needle into the skin flap only (and make sure it doesn't come out through the other side - I've done that before), check for blood (that there IS none) and give the injection.
Unless you're really experienced (in which case you wouldn't need my advice really), I would completely avoid giving shots in the vein. Most antibiotics are either IM or SC.
Hope this helps! Please feel free to email me for encouragement; I'll be glad to help the best I can. :)
|
|
Jeffers Supply Link
link
|
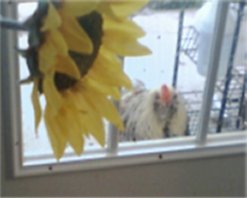 Ever feel like you're being watched?
|
|
|
|


